One Time Vendor
The One-Time Vendor feature lets you print checks from Business Central without having to create new Vendors in the system for one-time use.
A single One-Time Vendor ID is used for Vendors who users only expect to purchase from once. This feature provides unique tracking for each vendor transaction, while making it easier and quicker to pay these One-Time Vendors without having to set up a Vendor Card that would only be used one time.
When an Invoice for a One-Time Vendor is posted, the resulting Posted Purchase Invoice will retain the name and address information for that specific purchase.
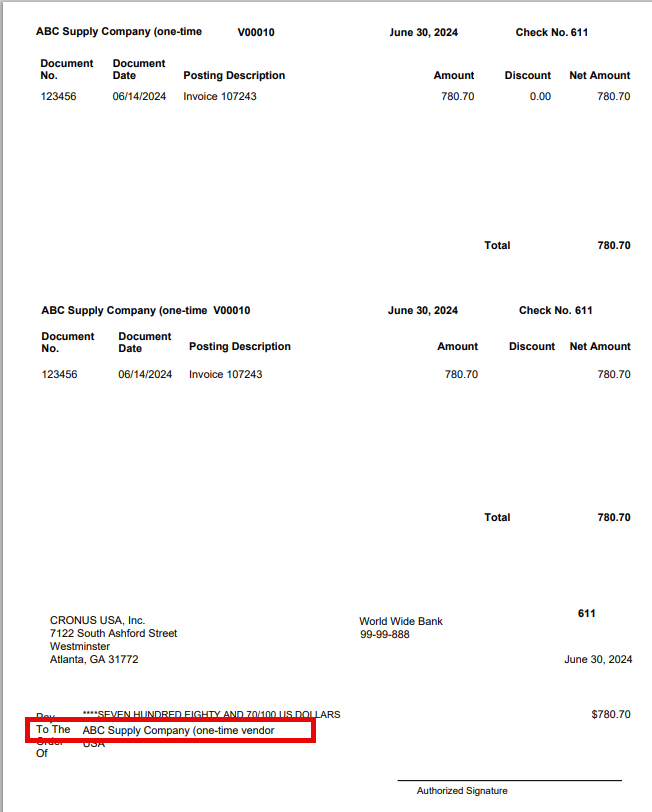
When printing checks from the Payment Journal for One-Time Vendors, the Print Check report will look to the Posted Purchase Invoice to get the Vendor Name and Address information that will print on the check.
Caution
The One-Time Vendor functionality cannot be used for 1099 records or reporting. Since the one Vendor ID set up for One-Time Vendors represents multiple one-time vendors.
One-Time Vendor Setup
- Navigate to Vendors.
- Click New to create a new One-Time Vendor ID. Note that this Vendor ID will be used for all single-use vendors, so it should be a generic Vendor ID/Name so it is easily identifiable as the One-Time Vendor ID.
Important
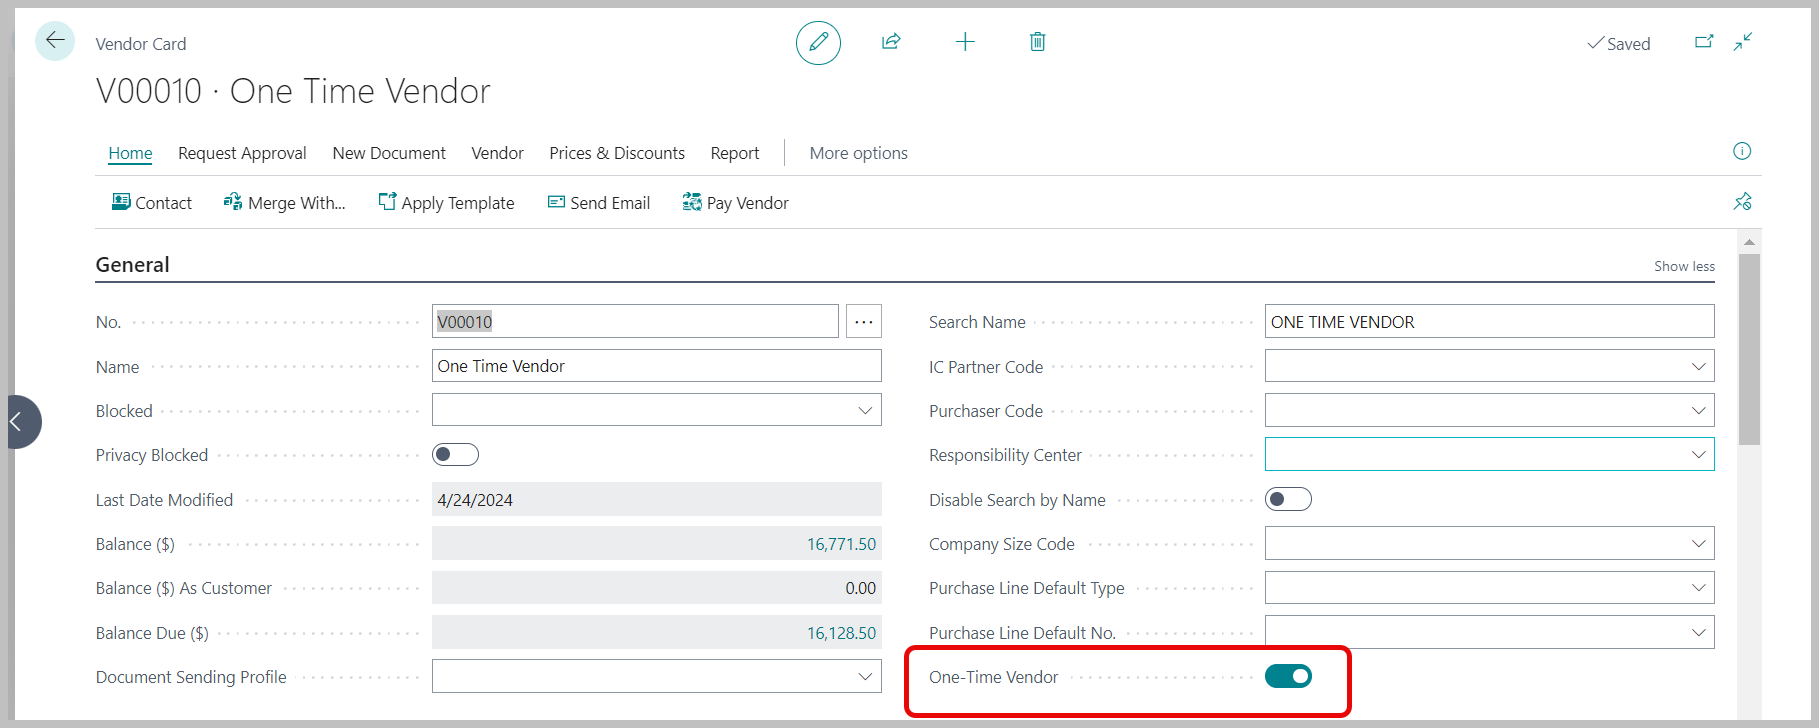
For the One-Time Vendor ID, only enter a Vendor ID, a Description that identifies this ID as used for one-time vendors, and set the One-Time Vendor Boolean to "true". Do not complete the rest of the fields in this Vendor Card. Vendor Name and Address information for checks will be pulled from the Purchase Invoice rather than from this Vendor Card.
- In the Vendor Card > General FastTab, set the One-Time Vendor Boolean to "true".
Important
Since there could be multiple Purchase Invoices to pay for different Vendors logged under the One-Time Vendor in a single check run, the Print Check process will always force the One-Time Vendor to print a check per single Invoice. This will ensure the 1x1 relationship between the posted Purchase Invoice and the check that must exist when using this One-Time Vendor. Otherwise, it would allow one check with multiple lines on the stub when each of those lines was meant for separate Vendors.
Creating Purchase Orders/Purchase Invoices for One-Time Vendors
In either the Purchase Orders List or the Purchase Invoices List, click New to create a new Purchase Order or Purchase Invoice.
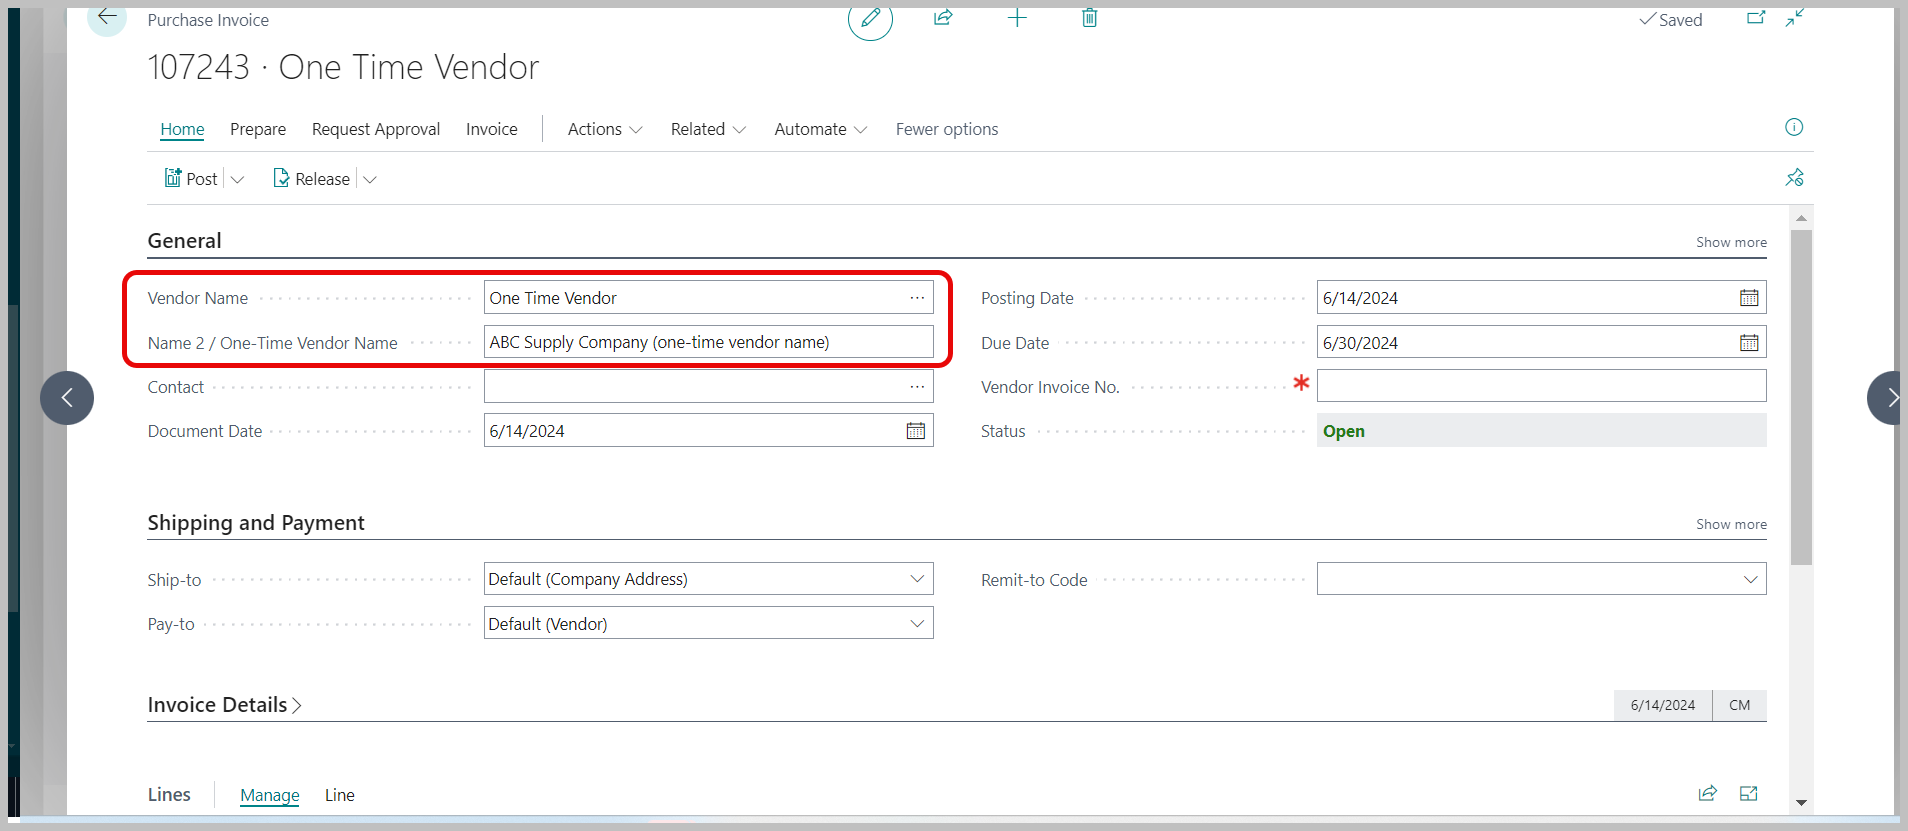
In the Vendor Name field, enter or look up the One-Time Vendor ID created previously.
Important
When the Vendor Name that is entered is the One-Time Vendor, the Name 2 field caption changes from Name 2 to Name 2 / One-Time Vendor Name.
Enter the actual name of the one-time vendor associated with the Purchase Order/ Purchase Invoice. This name will be used as the Payee on the check to the Vendor.
Enter the Vendor's Buy-From Address. This address will be used on the check.
Complete the rest of the fields as usual for a normal Purchase Order/Purchase Invoice and post the Purchase document.
Creating a Payment to a One-Time Vendor Purchase Invoice
Open the Payment Journal.
Click Prepare > Suggest Vendor Payments to retrieve open Posted Purchase Invoices to be suggested for this payment. Following are fields which need to be entered:
Field Name Description Last Payment Date Enter the Last Payment Date which specifies the latest payment date that can appear on the vendor ledger entries to be included in the batch job. Only entries that have a due date or a payment discount date before or on this date will be included. If the payment date is earlier than the system date, a warning will be displayed. Bal. Account Type Select Bank Account from the drop-down list. Bal. Account No. Select the Bank Account to be used for the payment. Bank Payment Type Select Computer Check from the drop-down list. Filter: Vendor Add the OneTime Vendor ID under Filter: Vendor > No. field. 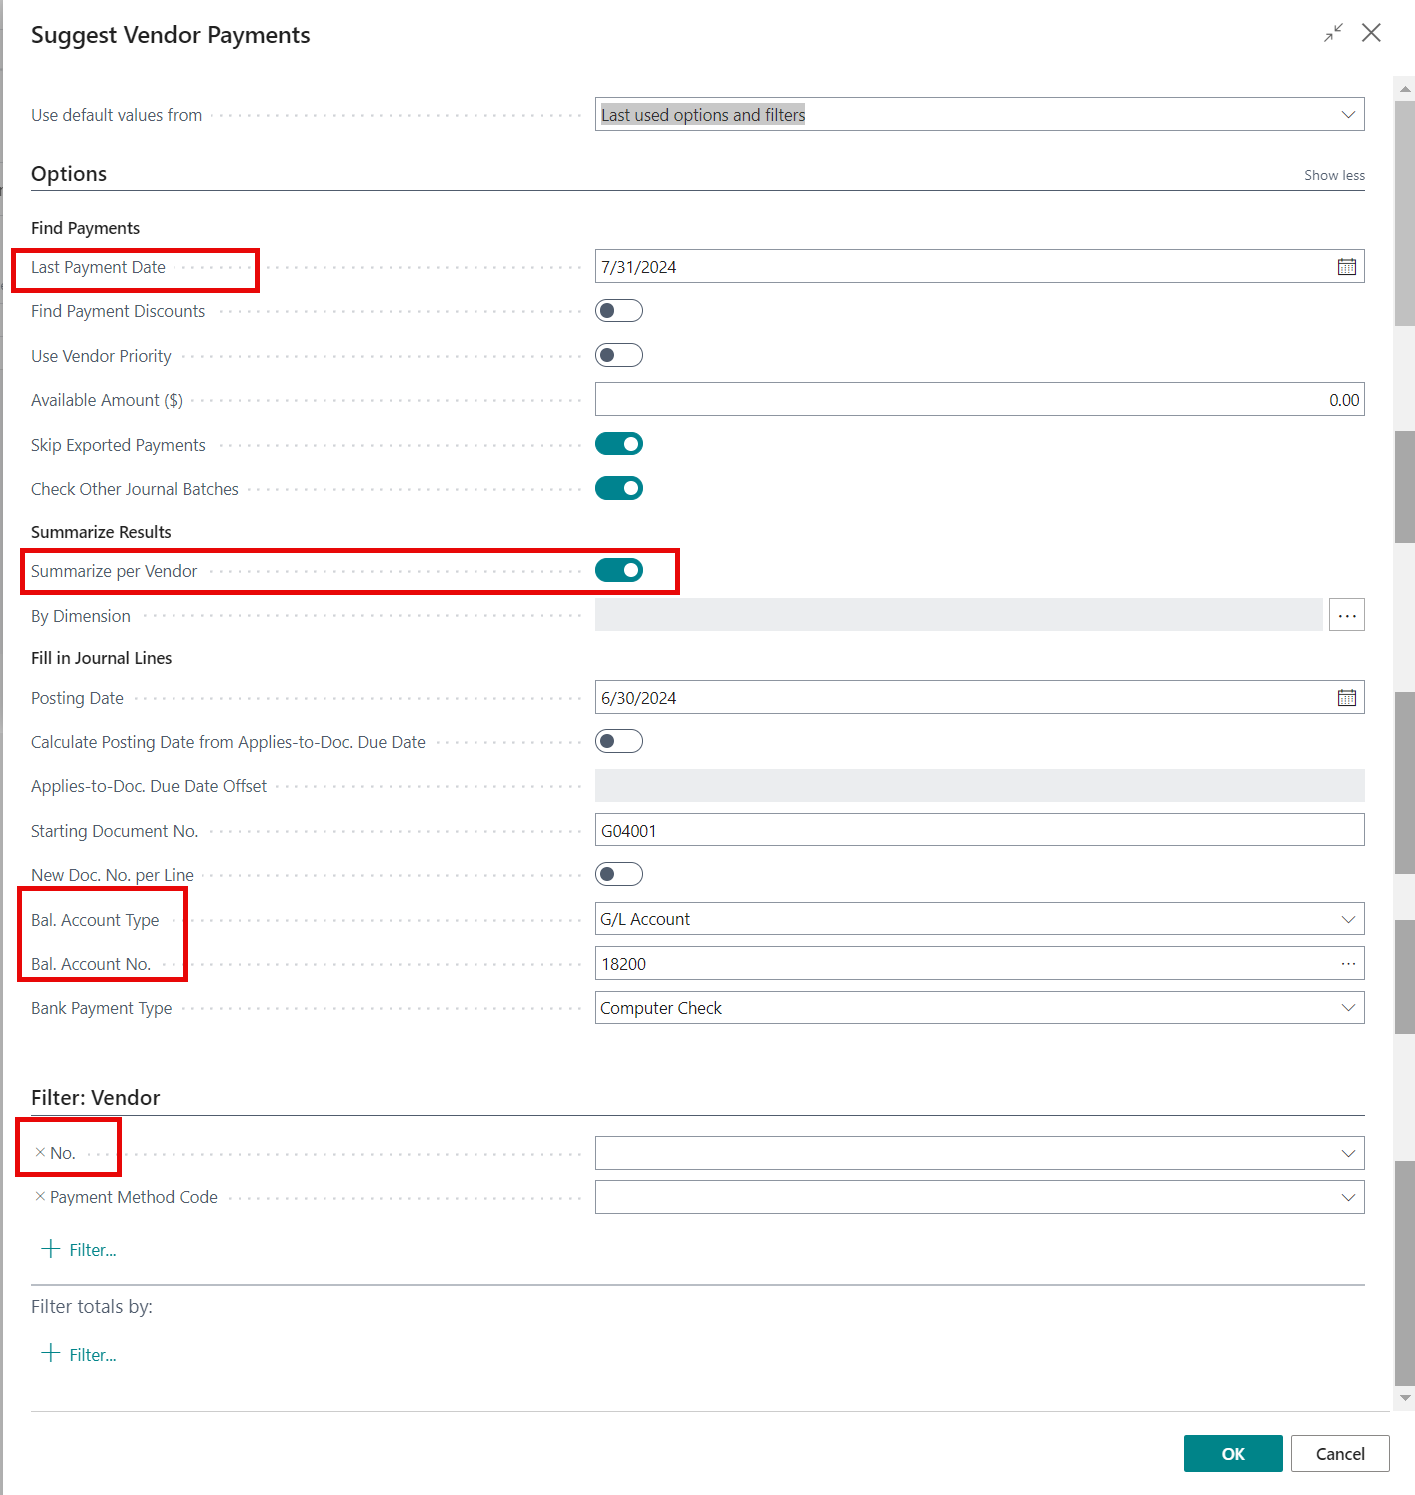
Click OK.
Click OK to message "You have created suggested payment lines for all currencies."
Note
When the Purchase Invoice is retrieved, the Description field in the Payment Journal is populated with the value entered Name 2 / One-Time Vendor field from the Posted Purchase document. This is the Payee name which will appear on the printed check.
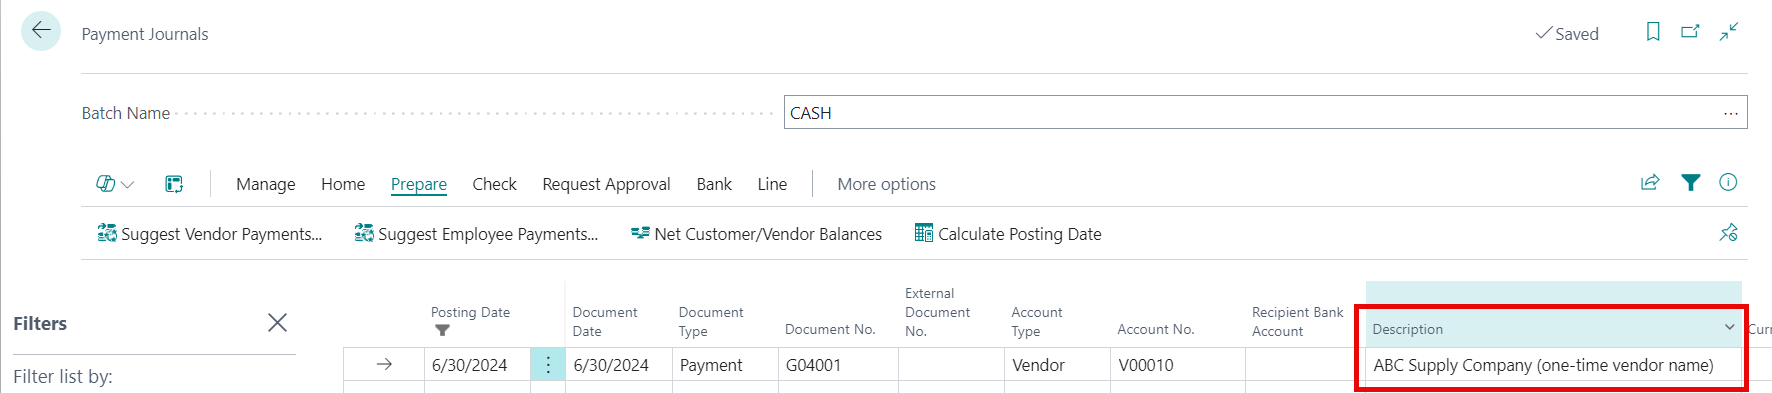
In the Payment Journal menu, select Check > Print Check. Process and post check as per usual Business Central procedures.
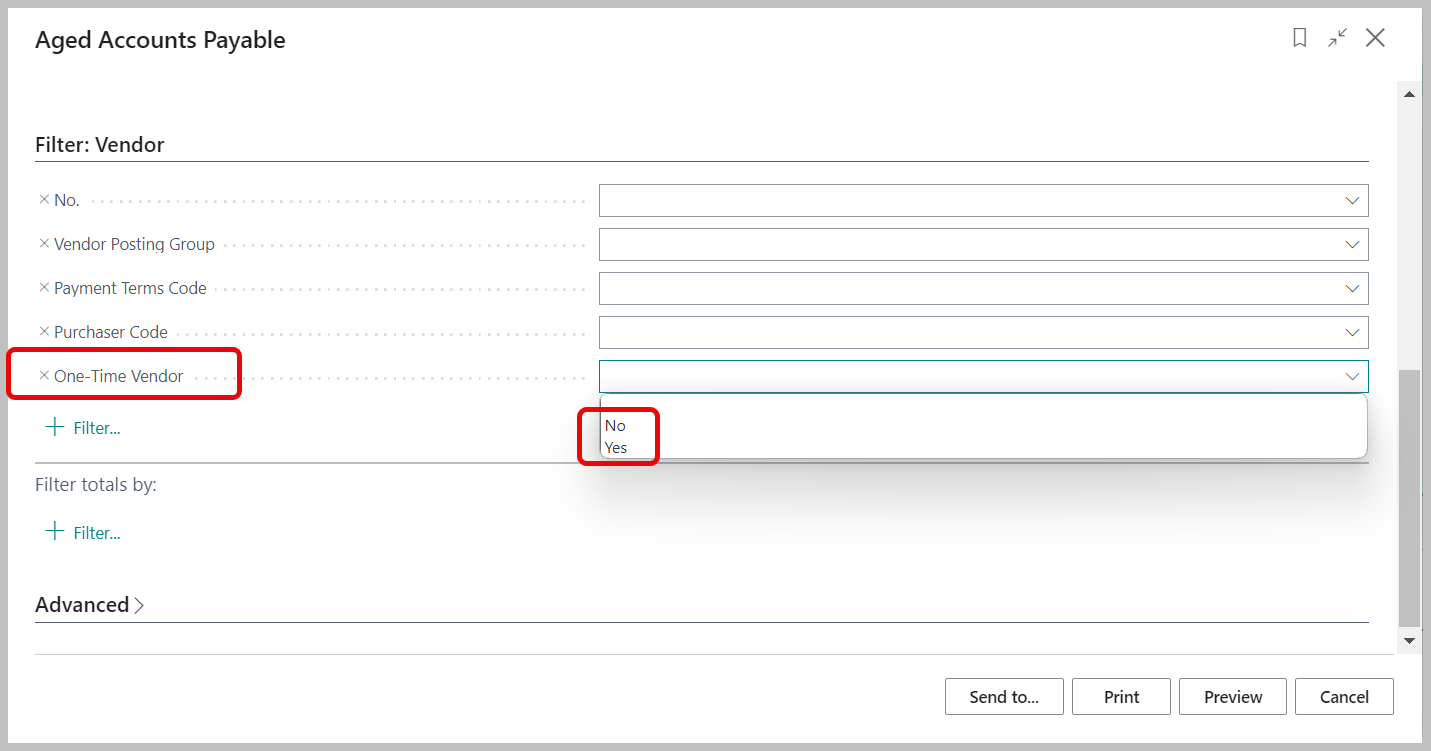
Aged Accounts Payable Report
By default, the Aged Accounts Payable report will include transactions from One-Time Vendors. To exclude One-Time Vendor transactions on this report, under Filter: Vendor > One-Time Vendor, select No from the drop-down list.